Wow! We have been so busy lately. It seems like yesterday that I posted, and yet I know it wasn't yesterday. We have been gathering bids to build our house. I finished school with my kids. We bought a new refrigerator. We are trying to get the garden in and do some yard work. Oh, and of course, the never ending mommy tasks of cooking, cleaning, and laundry! I have not had a lot of time for crafting as you may have guessed. That's OK (I think?). There is a season for everything.
I never posted my Mother's Day gifts I did and thought I would share those.
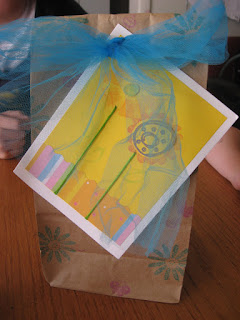
I really liked the way they turned out. I know our mothers appreciated them. They also know that I am a practical person and so they got a practical gift. The crochet Swiffer pattern is my own. You can reference my post about the crochet Swiffer cloth for the pattern. stamped two lunch bag sized brown paper bags with ink to coordinate with my homemade cards, folded the top over and punched two holes into the bag. Then, I just threaded a ribbon through and tied it. Very easy and cute.
Saturday, May 25, 2013
Sunday, May 12, 2013
Magnetic Art Board
This past week has been SUPER busy! I feel as though I have been going full steam and the steam is running on fumes. Ever felt that way? You're human. I'm sure you have. The upcoming week looks as though it will be full as well. I'm glad I was able to enjoy the day.
This was a fun and simple craft I did with My Princess. I purchased the magnetic board for $6.?? at The Wood Connection in Salt Lake a couple of weeks ago. My Princess painted some simple wood cutouts, and we glued them to a wooden clothespin and magnet. I cut out a circle from patterned paper with my Cricut and glued it in the middle. We cut out the text and flowers with my Cricut as well using white contact paper. You can refer back to my post about the Laundry Board for the depth and pressure I used to cut it. We attached some ribbon and hung it on her wall.
It is really cute and works great to hang up all her art "masterpieces" that accumulate. This will be easier to rotate them, store them (until mommy gives them away or discards them) and just plain keep them off the floor or glued to the wall (don't laugh- it's happened more than once)!
We had a lot of fun doing this project together! Thanks for stopping-Dari
Wednesday, May 8, 2013
Stash Buster: Knitted Baby Hats
I finally finished the two baby boy hats I was knitting for two friends. Once again I forgot to take a photo of my yarn before I began. I found a very simple pattern at http://twentysomethinggranny.blogspot.ca/2013/01/knitted-baby-bow-hat.html. However, I misread the pattern for the first one (on the left) and didn't give a border between my ribbing and my color change. I like it, though, and the recipient won't know I messed up! The second one I chose a k2 p2 ribbing and deliberately made thick stripes. These were very easy and whipped up quickly.
The photo of the card is not the best. I didn't realize it until I uploaded it. I folded a piece of white cardstock in half and cut the top 2 corners on a diagonal. I cut a piece of patterned paper slightly smaller than the dimensions of the white card base and then cut it in half. Next, I cut a piece of light blue cardstock. the same size as the dimensions of the card base, but instead of cutting it in half, I tore the edge. I cut out a small frame with a darker blue cardstock and inked the edges white. I adhered it to the card using pop up adhesives. On white cardstock I stamped the baby blocks and used watercolor pencils and a blending pen to give it a soft pastel look. I adhered it to the card with a pop up adhesive square, too. I cut a small rectangle, inked it, glued it to the top, and punched a hole in the middle. I tied a piece of translucent ribbon on top and finished it by stamping the sentiment with an olive green ink.
Hope you have a great day and thanks for stopping by!
Friday, May 3, 2013
Laundry Board
How annoying that I can't turn off the underlining above. Oh well! Using cheap white contact paper, I cut out the text on my Cricut. I set the pressure to 2 and the blade depth to 4. Wah lah!
I am going to hang this in my laundry room (go figure), and as I am folding clothes, I will hang the "hang ups" on the pegs so they don't wrinkle while they lay over my craft chair until I get around to hanging them up (not very often!).
I hope this helps me. If not, it will brighten up my laundry room! Yea!!
Subscribe to:
Comments (Atom)


