Showing posts with label crochet. Show all posts

Wednesday, February 4, 2015

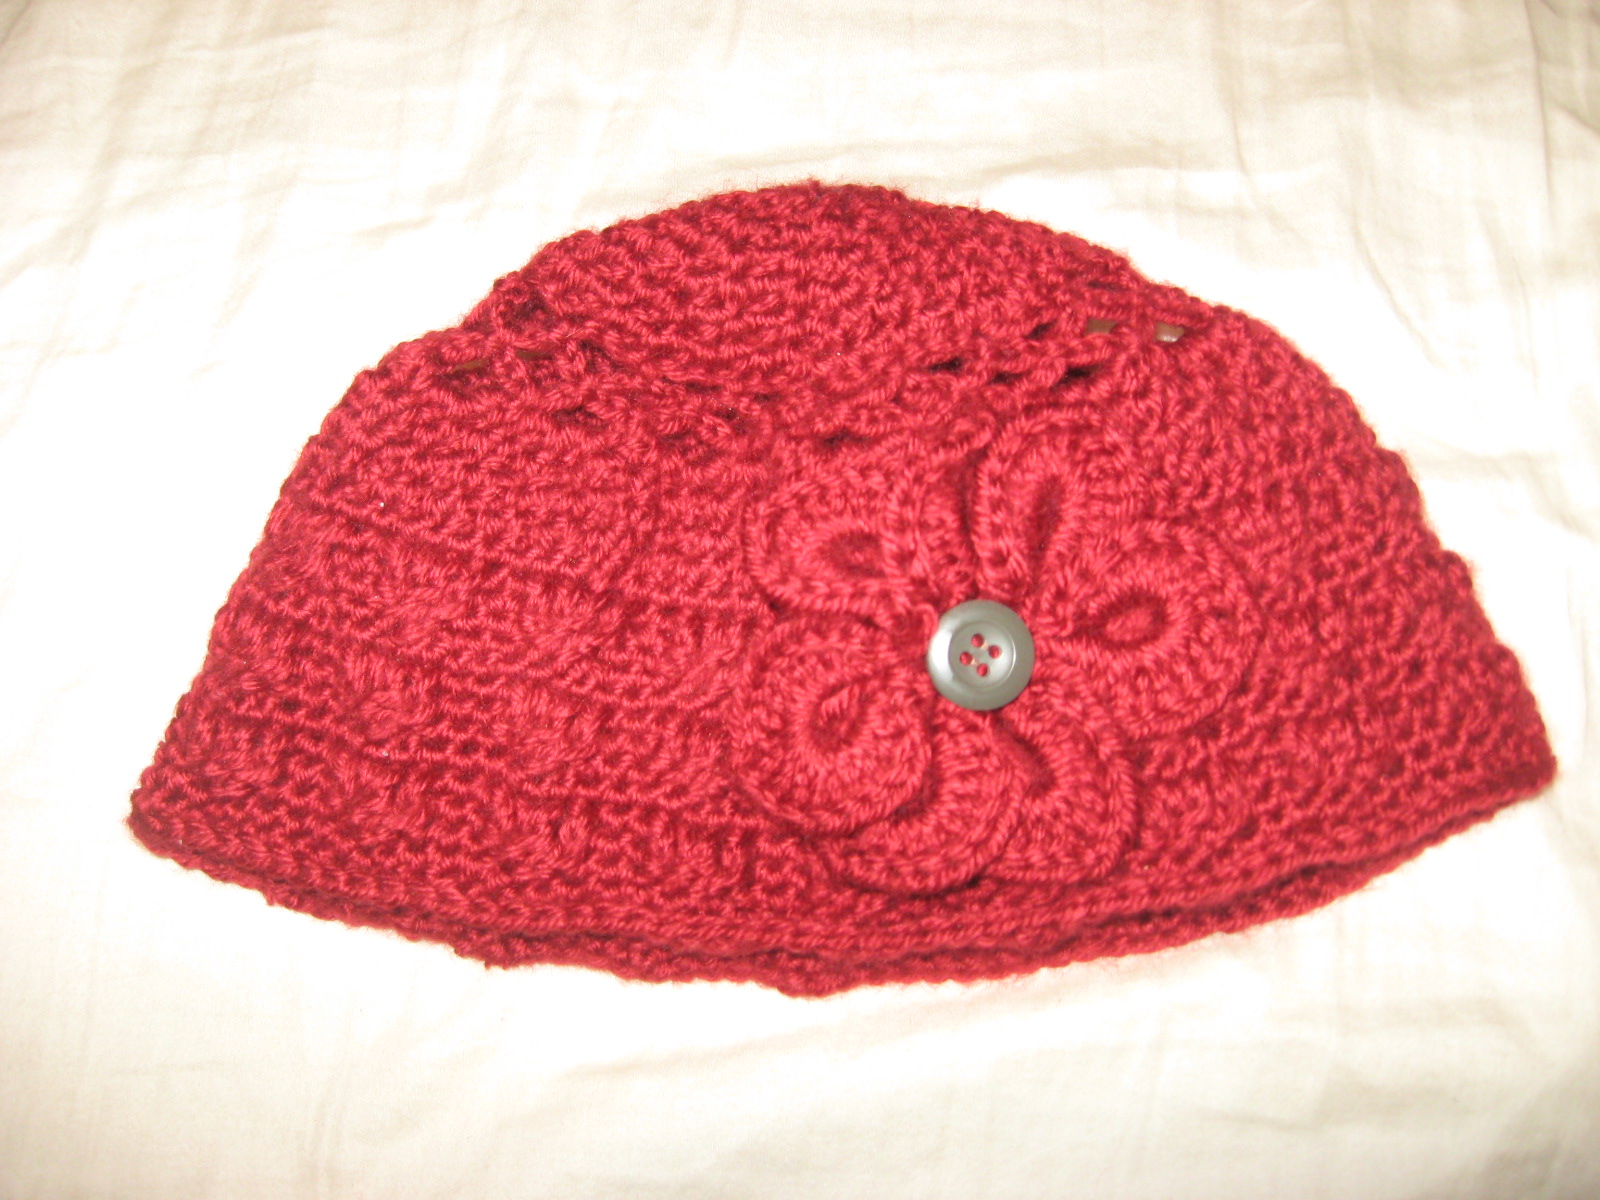
My New Winter Hat!

Hello! Hello!  OK.  So, I know winter is more than half over, but I wanted to make myself a new hat.  I pulled out my scrap skeins and my crochet hook.  This took me awhile, because I didn't follow a pattern.  I just made it up as I went.  Sorry, I won't be posting directions for this one :)! 

My favorite color has always been some kind of hue of blue.  Right now it is almost a turquoise blue.  In this hat, I used several different stitches: single crochet, half double crochet, double crochet, double crochet cable stitch, and a double crochet shell.

I LOVE my hat!  My husband thinks it is an old lady's hat.  He tried to explain it to me, but I still didn't get it :).  He doesn't have to wear it.  My little princess loves it, too.  She wants one just like it "except it needs to be purple and pink and have ears" is what she said (lol). 

Thanks for joining me today! Hope this inspires you to create your own work of art :) -Dari

Wednesday, April 30, 2014

Wednesday WIP


What a beautiful morning!  I have been making progress on my new summer hat for 2014.  I am almost done.  I need to finish the last round of SC (single crochet) on the bottom and add the brim.  Yea! 

I am still reading this great book called Wake Up To A Happier Life by Amanda Dickson.  This morning I read pg. 27.  Here she counsels to "Let 'just' and 'have to' fall out of your vocabulary. You aren't just a clerk and you don't have to go to work.  You are blessed with a job where you get to serve people, including yourself, your family, your boss, not to mention your customers, every day.  And you don't have to go to work- you get to, you choose to, you want to.... See- this stuff isn't so hard.  Just because you've never done it before doesn't make it hard.  It makes it unusual maybe, but not hard... You may not have done it before, but it's easy... it's just unfamiliar."

This really hit me this morning, because I just signed on as an Independent Consultant for Close To My Heart.  I am REALLY excited and just about as nervous, too.  I am not one who takes risks.  I don't like soliciting.  And yet, I LOVE their products and have been looking for a way to either supplement our income or to fund my own entrepreneurial endeavors with my table cloths, scarf holders, etc. I just realized that I haven't posted my Scarf Holder. 

I am amazed at what we can accomplish when we change our outlook on life!  Thanks for stopping by. -Dari

Wednesday, April 23, 2014

Wednesday WIP


Hello! Hello!  We have sure had bipolar weather here in Oakley.  Monday was absolutely beautiful.  It almost reached 70F, which is unheard of for this time of year.  Then last night it snowed!  I woke up to a winter wonderland.  My kids cried.  I thought it was humorous.  Now, the sun is shining and the snow is all but gone.  How's that for ya?!

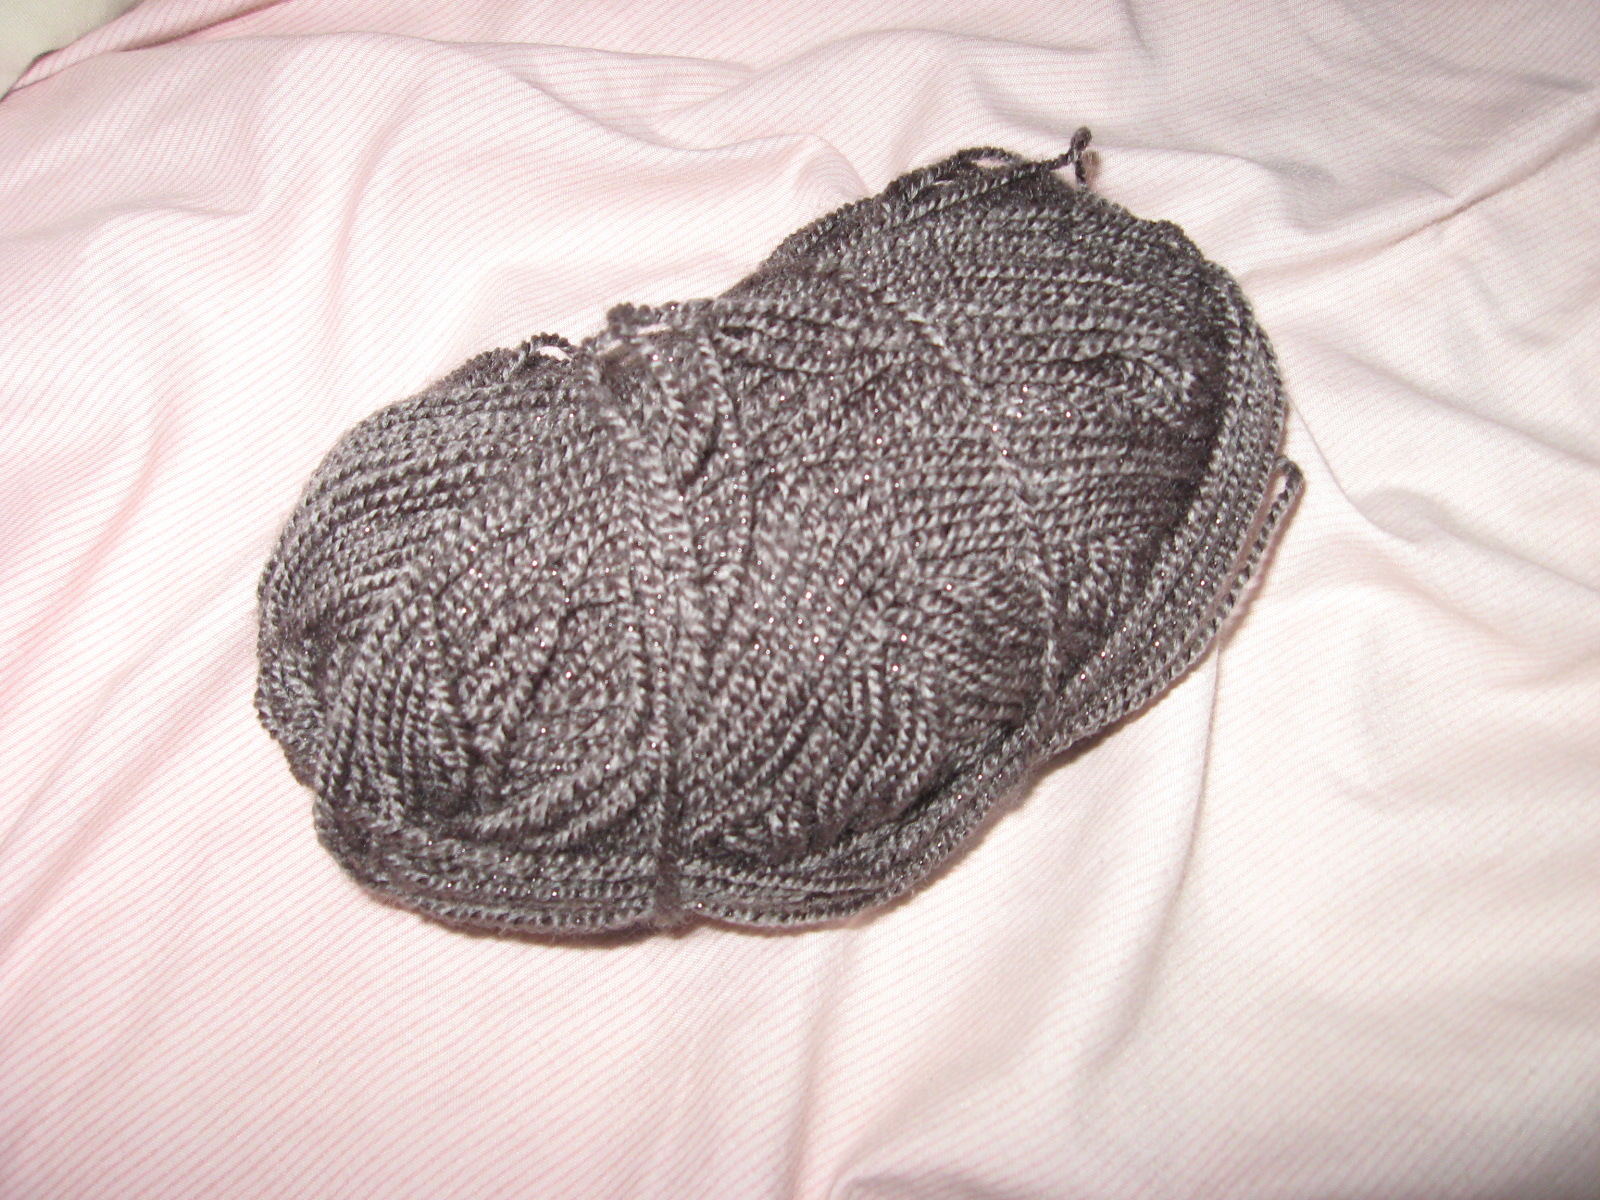
I have two projects on the hooks/needles right now.  Neither one is going very fast, because the weather has been so nice, I have wanted to be outside.  And, I have been teaching two friends how to do family history/genealogy.  The top one is my new hat for this year.  I am NOT a shopper.  I loathe shopping (unless it is to the craft store).  But, I have this fettish with hats.  I wear them all the time outside.  It is a tradition that I make a new one for myself every year.  I made one for My Princess.  It is pink, of course.  The bottom one is the toe sock I am knitting for my husband.  It may just end up being his Christmas present this year.  Wow!  Amazing concept.  If I actually commit myself to finishing it for Christmas, I can truly say that I have began my Christmas gifts.  Every year I think, "I should start a lot earlier on making my Christmas gifts."  Hmm.  I just may have to.

 Product Details

I am currently reading a really uplifting book entitled Wake Up to a Happier Life by Amanda Dickson.  She is a radio talk co-host.  This morning I got a kick out of my reading.  She wrote, "Sometimes it is the simplest work that gives us the easiest access to the most tangible joy."  She continues, "You can get that feeling from getting the garbage out before the garbage man comes.  Just once you want not not be caught in your pajamas as you hear the truck starting to head down your street.  And on that time that you remember to to put it out the night before, and it doesn't storm and blow anything over or strew your trash on your neighbor's lawn, you feel such a sense of accomplishment.  Ahhh."  As I read this, I had a vision of recent date of me running up the street in the middle of the day chasing the newspapers that had blown out of my recycling bin. 

She quotes James M. Barrie in the beginning of this chapter.  He said, "Nothing is really work unless you would rather be doing something else."  Great food for thought.  Hope you have a great day! -Dari

Friday, March 14, 2014

Finished Project: Crochet V-Stitch Newborn Hat


I finished it!  Yea me!  I am really excited with how it turned out. Someday I may get ambitious and write up the pattern. It will have to be soon, though, while I can still remember it and before I give the hat to my new little neice (lol)!  I found the little flower pattern at http://www.daisycottagedesigns.net.  Lauren posted the instructions for this cute little thing on March 11th.  I thought it would be the perfect finishing touch to my hat. 

Thanks for stopping!  Hope you have a great weekend. -Dari

Wednesday, March 12, 2014

Work In Progress: Dainty Crochet Newborn Hat


It has been way too long since I posted any crafts.  I love to see everyone else's finished creations.  There isn't anything amazing about the photo you see above, and I'm sure no one else is going to "pin" it or share it anywhere, but I have been working on this for over a week!  That's right.  This little piece of work has been quite the unintended project.  

My sister had her baby last Monday, and I love to make hats.  I think every baby should have a hat (or 12).  I chose this purple skein from my stash, because my sister's favorite color happens to be purple.  Anyway, a newborn baby hat should only take an hour or so to make, right?  That's what I thought; however, I had decided on a lacy pattern that got lost in the variegated colors.  So, I ripped it out and started with another stitch.  This time a shell pattern.  The same thing happened.  I just wasn't pleased with the way it looked.  I have ripped this hat apart at least 6 times.  

Finally, I have settled on a stitch that looks dainty and yet doesn't get lost in the changing colors of the yarn.  What? You ask.  A simple V-stitch using Double Crochet. Now that I am finally settled on a stitch pattern, I may actually finish it soon!  Look for the finished project soon! Thanks for stopping by. -Dari

Friday, February 28, 2014

Crochet and Quilt Hot Pads


I so did not intend to post hot pads back to back!  I finally finished these yesterday.  I began them a month ago while watching the JR. High State Wrestling Tournament.  When I came home, I left them in my yarn bag and haven't thought much about them until yesterday.  I pulled them out and was able to finish them pretty quickly.

The tops are crocheted in 100% cotton.  There is a piece of white cotton fabric sandwiched between the top and a thick heavy fleece fabric.  I cut some print fabric on the bias and created the bias tape used along the edges.

I have made 2 of each to sell on my Etsy site.  Hope you enjoy!  Have a great day- Dari.

Tuesday, February 25, 2014

Patriotic Apron with Crochet Flower

Hello! Hello!  I finally finished these three aprons that I started a month ago to sell on my Etsy shop.  Life has been very busy the last little while.  There are always excuses, right?  Please tell me I'm not the only one!!!

As I mentioned before, I have 3 of these available for sale.  As with all of my creations, they are created as I go meaning that during the creative process I tweak each one to modify it and it takes on a life of its own.  I have a really hard time duplicating the same thing exactly, because I always think, "Oooh.  That would be better," or, "I wonder how that would look."  The first one I made is a perfect fit for me.  That being said, I had to enlarge the next two, because I realize that not everyone is the same size as me.  Each of these aprons has a different red button in the center.  One apron has fabric ties.  One has ribbon ties.  However, they all look the same and so I posted the best picture.  (I have come to the conclusion that I need to learn how to take better pictures).

I thought I would share the crochet flower pattern with you, because it is so easy and is a very versatile embellishment. I used a size H crochet hook and medium (size 4) Simply Soft yarn.  The source is from the book Crochet Stitches: Visual Encyclopedia.

Ch 5, sl to form ring.
Ch 7 (this counts as dc & ch-4 space), *2 dc in ring, ch 4.* Repeat 5 times.
Dc in ring, sl in 3rd ch of beginning 7-ch.  Do NOT turn (should have 12 dc).
*Sl, sc, hdc, 5 dc, hdc, sc, sl* in each ch-sp around.  Fasten off.

That's it!  Hope you enjoy! -Dari

Saturday, February 22, 2014

Crochet Earrings


I think I am doing pretty good with my new system.  I have posted for the last three days.  Go me!  Yesterday I took 10 minutes and finished the top pair of earrings (teal).  They are made out of cotton yarn.  To make: I used a size F crochet hook. ch 5, sl to join.  ch 1, 12 sc in center, join to top of first sc. * ch 3, skip 1 sc and sl into next. Repeat from *.  sl into base of first ch.  fasten off.  The rest is really simple.  I opened the earring and inserted around one yarn segment closing with needle nose pliers.  Then I attached the charm to the bottom of the earring using a jump ring (I think that's what it is called) by opening it up and attaching a segment of yarn and the charm to it.  Then I used needle nose pliers to close it.

The second pair (purple) is made using regular (weight 4) yarn.  Both types of earrings were made from scraps, and I can't remember what brand they are!! Honestly, I am not all that concerned about wasting precious brain cells to try to remember, either!  Anyway, using a size F crochet hook, I chained 16.  Then I sc in the second ch from hook twice, *1 sc in next, 2 sc in one after*.  Follow this pattern to end. Ch 1, turn and repeat the same pattern.  Fasten off and weave in ends.  After playing with the curlique and deciding  where the best place for the earring to be attached to (I had technical difficulties and must confess that I pulled the earrings apart a few times before I was satisfied with how they hung), I closed the loop with needle nose pliers.

I know these instructions are simple.  I hope they make sense.   These were really easy and fun to make.  If you don't understand the directions, just leave me a message, and I will try to help.  

As always, thanks for stopping by! -Dari

Saturday, May 25, 2013

Mother's Day/Stash Buster Crochet

Wow!  We have been so busy lately.  It seems like yesterday that I posted, and yet I know it wasn't yesterday.  We have been gathering bids to build our house.  I finished school with my kids. We bought a new refrigerator.  We are trying to get the garden in and do some yard work.  Oh, and of course, the never ending mommy tasks of cooking, cleaning, and laundry!  I have not had a lot of time for crafting as you may have guessed.  That's OK (I think?).  There is a season for everything.

I never posted my Mother's Day gifts I did and thought I would share those.


I really liked the way they turned out.  I know our mothers appreciated them.  They also know that I am a practical person and so they got a practical gift.  The crochet Swiffer pattern is my own.  You can reference my post about the crochet Swiffer cloth for the pattern. stamped two lunch bag sized brown paper bags with ink to coordinate with my homemade cards, folded the top over and punched two holes into the bag.  Then, I just threaded a ribbon through and tied it.  Very easy and cute.     

Monday, April 15, 2013

Stash Buster Crochet Newsboy Hat


Hello! Hello!  I have wanted to post something "yarny" for a week, but I've been caught up in trying to educate my children.  Amazing concept, huh?  I have done quite a lot of things with My Princess for preschool and will have to post about those adventures soon.

Anyway, I LOVE hats.  I also love to be outside and wanted a new hat for me.  That, too, is an amazing concept.  My children are always asking, "Who's that for?  I want one, too."  Well, this hat is actually for Me, Myself, and I!

I was searching Pinterest for some ideas and ran across a really cute design on  http://crochetncrafts.com/crochet/cross-over-long-dc-hat.html .
Seeing the designer's hat is worth the click.  You cannot see the Long Double Crochet pattern very well in my picture.  I think the black hides it.  

Once my hat was finished, I crocheted a little flower out of the bright light blue.  The pattern for this is the flower I used for my Tropical Flower Headband.  You can download that pattern on my website daris-corner.weebly.com. After I crocheted the flower, I hot glued it to an alligator clip so that I can interchange different flowers/motifs according to my mood.

Wishing you a wonderful day!-Dari

Saturday, April 6, 2013

Stash Buster Knitted Dish Cloth and Swiffer Mop Cloth


OK, so I am taking an online knitting class and finished my first knitted dish cloth.  I am pretty pleased with the results (with the exception of the white pointed corner).  I will have to learn how to decrease and cast off without a funky point!  Any words of advice are welcome! Although this is not a 100% stash buster project, it began as one.  I got half way through the project with the pink and realized that I didn't have enough to finish, so I bought some white (the dye lot did NOT match). Go figure!! 

After I finished this, I immediately began crocheting a Swiffer Cloth for my sister-in-law.  I helped her this morning with some of her cleaning and decided she needed one.  She doesn't like purchasing the disposables.  They are expensive.  Who would?  Anyway, I had an almost full skein of the white yarn I purchased for my dish cloth and thought it would work just fine.  I typed up my pattern and posted it on my website if you would like to use it. 


Hope you enjoy my yarn creations!

Thursday, April 4, 2013

My Phonics Mat

I finally finished my smaller version of Sally the Sound Snail. Yea!  She will be much better suited for the desired purpose.   So, what is her purpose you ask?  Sally helps blend sounds together.  In some of my research for language/reading development, I ran across several methods that use either a sound train or a board to help children blend sounds together, thus beginning the process of creating words.

This is just the direction I have been trying to go with My Princess, but was not sure how to accomplish it.   As I merged ideas from these various sources, I came up with "My Phonics Mat" and Sally the Sound Snail.  Here are my ideas for using the mat and snail:
1) Place letter cards on the mat and have Sally slowly slide across the mat while saying the sounds out loud.
2) Place all the vowel cards on the mat and have My Princess put Sally on the card that makes the sound I dictate.
3)Have My Princess place letter cards on the mat to build words and then sound them out.
4) Write a word on a paper and have My Princess recreate the words with the letter cards.
5) Reverse the process by using the letter cards to create a word and having My Princess write the words letter by letter on the mat using dry erase markers.
6) I am sure I will come up with other uses for it!

I laminated "My Phonics Mat" for durability and also to enable My Princess to write directly on the mat.  Right now we are using it to solidify her understanding/mastery of the soft vowel sounds.  Next, we will add one consonant sound at a time and blend it with the vowels individually.  Progression will follow.

I would love for you to use this as well to help you in your educational endeavors.  You may download "My Phonics Mat" and my letter cards on my website.  The link is found at the right!
If you come up with any other ideas to use this, let me know.  I'd love to hear.

Wishing you a happy day!- Dari

Monday, April 1, 2013

English Garden Crochet Hat

Hello!  Although I have been working on busting through my yarn stash, I actually purchased this Caron Simply Soft Autumn Red yarn specifically for this hat.  It is another one for my cousin-in-law.  She loves this color.  I designed this hat using a Griddle Stitch pattern.  It is ideal, because it can be worked on any number of 2 stitches.  I always make my hats in increments of 10, so this stitch fits the bill. 
To create this stitch, add 2 st to base ch.  Skip 3 ch (counts as first DC), *1 SC into next ch, 1 DC into next ch; repeat from*.  When using this in row fashion, end with a SC in last stitch, turn. Row 2: Chain 3 (counts as DC), skip 1 st, SC into next DC, DC in next SC, etc. until you reach end of row.End with SC in top of turning chain, turn. Repeat Row 2. When working with this stitch in the round, I increased alternating SC and DC in the same st.Of course, this doesn't look the same as it would in row fashion, but it does add texture and is different than a simple SC or DC pattern.

For the cables, I only used FPDC!  This pattern is worked over a set of 6 stitches.  Rows 1 & 2- CH 1, SC in same st and SC in each remaining st. SL to join.  Row 3: CH 1, SC in same st and in next st, FPDC around next 4 st, *SC in next 2 st, FPDC around next 4 st.  Repeat from *. SL to join at end of row.  Row 4: CH 1, SC in same st, SC in next, *skip 2 SC, FPDC around next st 2 rows below, FPDC around next st 2 rows below, go back to first skipped st and FPDC around that st 2 rows below, then FPDC around next st 2 rows below, SC in next 2 st. Repeat from*. SL to join at end of row.  Repeat rows 1-4.

For my flower, I used a pattern that I pinned from Lianka Azulay.  The source is: http://bonitapatterns.tumblr.com/post/3994231401/here-goes-a-free-pattern-for-a-croco-flower-its

Hope you enjoy!


Wednesday, March 20, 2013

Stash Buster #12 Gel Ice Pack Pillow

I am so excited about this one for lots of reasons! First, it is very practical and needed at the current time in my life; second, I love the way it turned out; and third, I used a new stitch which is really fun.
So, what am I so excited about? Gel Ice Pack Pillow.  I have been layering washcloths and ice packs on my face for a couple of weeks now. During one of my moments of frustration I thought, "I should make something that would keep these layers together."  Some of the best inventions are created out of necessity!


I even remembered to post a picture of the yarns I used from my stash.  As you can see, most of my yarns are not in beautiful balls.  Once upon a time.  I don't even remember when that part of my life went out the door!

I wanted to share an up close photo of the sedge stitch I used.  It is one I will definitely work with again.  To create this stitch you need any set of 3 stitches + 1.  For the chain base, add 2.  Turn.  Skip 2 ch, HDC & DC in next stitch; *skip 2 ch, SC, HDC & DC in next st, repeat from * until end.  In last stitch, SC only.
Consecutive rows: Turn, CH 1 (counts as SC), HDC & DC in same st, skip 2 st and repeat from *. That's it!  It has a nice subtle texture and pretty pattern.

To top this off, I made homemade gel packs.  Oh! No! I forgot to take a photo of one.  However, here is the recipe.

HOMEMADE GEL PACKS

1/2 C rubbing alcohol
1 C  water
Blue food coloring
ZipLoc sandwich bag
Food Saver bag and sealer, opt.

Fill sandwich bag with ingredients.  Seal. Place in freezer overnight.  How simple is that?  They work great!


Monday, March 18, 2013

Stashbusters #9-#11 Amigurami


Hello! As I am looking at my pictures, I realized I haven't glued the eyes onto my turtle, and I don't have an individual photo of my knitted bunny (lol)! Oh.  I also forgot to take photos of the yarns I used from my stash.  Oops! I created the snail with the intention of using her for "My Phonics" preschool mat curriculum I am working on, but alas she is TOO big.  She is about 7 inches long.  For my educational purposes, this won't do.  From my little princess' perspective, that is just fine.  I will have to make a mini snail. The turtle with the missing eyes (lol) is for my oldest son.  He really wanted a cute puppy, but after my ugly cheetah I made for my second son, I lost the excitement to make a puppy.  I might have to practice some more, but amigurami is not my favorite.  The knitted rabbit is my second attempt at knitting.  I found a really good tutorial at http://josoandsew.wordpress.com/tutorials/knitted-bunnies/.  I made mine 15 stitches larger than she did.  I think I will make one a little smaller than hers.  It is very cute and a very good beginner project. Yea!

Thursday, March 14, 2013

Stash Buster #8 Tropical Flower Headband


OK, so it is really UNUSUAL for me to post more than once a day! As you may have noticed, I haven't been consistent with posting on a regular basis for a while. I don't have that much free time with homeschooling, cooking, cleaning, creating, etc., but I have been under the weather and so I have had a little more time lately. As I was browsing on Pinterest earlier this morning, I ran across a really pretty crochet flower and thought, "That would be perfect for the headband I want to make." Unfortunately, it did not have a corresponding pattern. I printed the picture and picked it apart and thought, "I can do that!" Of course, I had to get to work while the puzzle pieces were in my mind!

The result? My tropical flower headband!!  I love it.  I am uploading the pattern, which I typed up today, too, onto my website.  The link is on the right column.  I am just tickled with the way it turned out.  If you like it, let me know!

Happy hooking!

Stash Buster #7 Beaded Watch

Hello! Hello! I bought a watch face at Michaels on clearance a year ago with the intention of making myself a watch. Well, it took me almost a year to get around to it! I am quite pleased with the results. I used a HDC Multiple Cluster stitch. It gives the fabric a nice texture. To work a HDC Multiple Cluster stitch, you need a any stitch count of 2 stitches + 1. So, you could have 8+1=9 or 20+1=21. For the base chain, you need to add 1 more. At the beginning of the row, chain 2 (counts as 1HDC), *1 MC (multiple cluster) by YO, insert hook into same stitch, YO, draw loop through, YO, draw through 2 loops, skip 1 st, [YO, insert hook into next stitch, YO, draw loop through] 2x in same st (6 loops on hook), YO, draw through all loops on hook. Wah! Lah! Repeat from * across row. You should finish an MC in last stitch. HDC into same place and turn. Begin again. Have fun. Hope you enjoy!

Monday, March 11, 2013

Stash Buster #6 Crochet Book Tote

I am so excited to share this. I have been working on it for 2 weeks now. I finally finished it last night. This is my new scripture tote. I got the inspiration from Laura at http://tillietulip.blogspot.com/. I just love her daisy granny. She has a free tutorial on her blog. I put a fabric lining on the inside. It has 2 pockets, one on each end. One of them is divided into smaller pockets for pens, etc. After I finished the handle, I decided I wanted to embellish it with a matching daisy. I had to modify it, however, because I didn't want it to be a granny square. So..... DAISY EMBELLISHMENT PATTERN 1) I began with a magic circle and did 11 sc into the center. SL into top of first one. 2) With pink color, I SL into any space, *then chain 4, 2 TC (treble) in same space, chain 4, and SL into same space. 3) SL into next space and repeat from *. To finish off SL into base of first petal. Fasten off. Weave in ends. Really easy! I added a corkscrew instead of leaves. Using brown yarn, chain 32. Turn. HDC in 3rd chain, 2 HDC in each of remaining chains. Fasten off. Weave in ends. I ended up using more yarn colors than I had originally posted. Here is what is left of the colors I ended up using. Thanks for stopping!

Wednesday, February 27, 2013

Heart Dish Scrubby

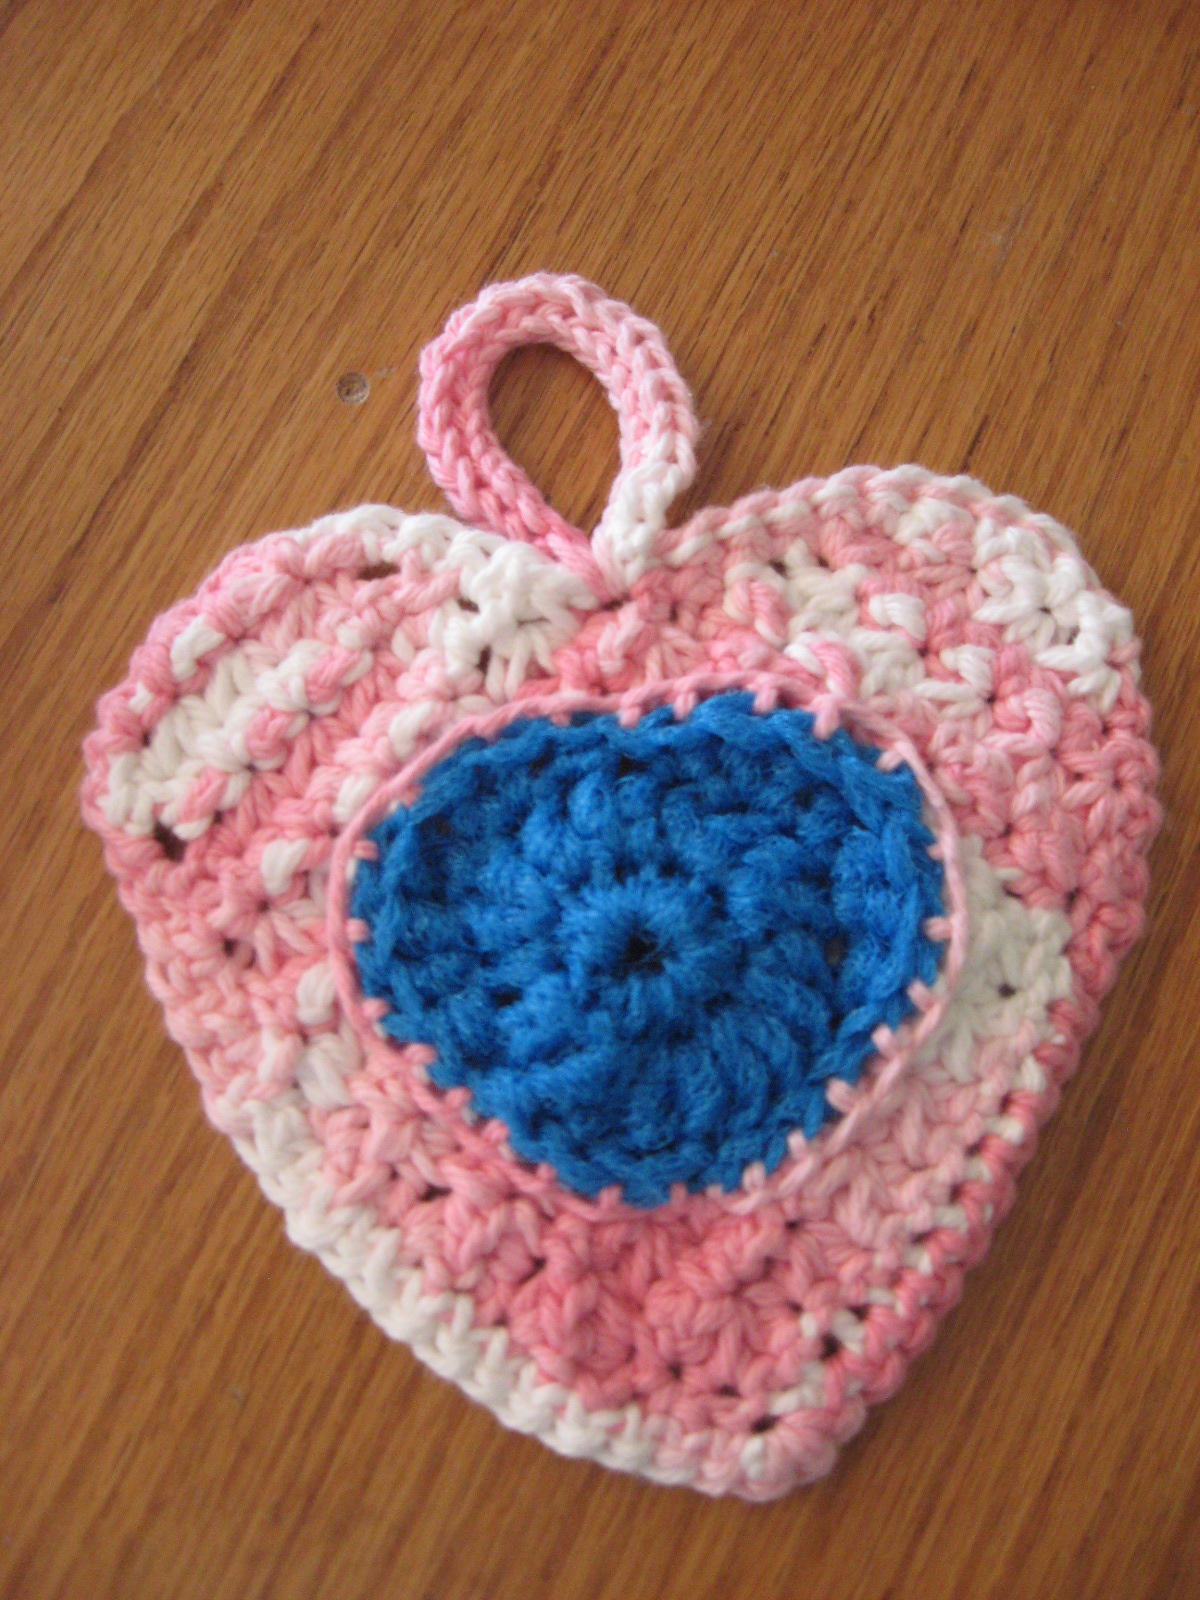
OK. Here is my latest scrubby. My 9 year old likes it better than all the others. It is one of my Stash Buster Projects. I used a new stitch (for me) called the Trinity Star. It is a really fun stitch. There are actually little stars throughout the piece. You can't tell very well because of the variegated colors in the yarn. I think I will use a solid color the next time I use this stitch. This is my own design; however, there are a couple of areas where I don't remember what I did to finish it. I worked it as one piece starting with a square, then I added one rounded top, but after that it got complicated. I single crocheted around some area in order to get to the other corner to do that round, then I single crocheted, and then I slip stitched, and then.... you get the point. I should have written it down!!! The scrubby portion began as a circle, but then I added 2 rounded parts and used up the last of my nylon netting, so this is the last scrubby I am doing for awhile. Yea! Kind of. I have had a lot of fun making them, and they are a quick project. Oh. I almost forgot. I used yarn and a blanket stitch to adhere the scrubby to the dish cloth. My next project is not going to be so quick. I am making a book tote. Here are the yarns from my stash I am planning on using.

Tuesday, February 26, 2013

Crochet dish scrubbies

I am so excited! For Christmas I made my Mom a simple dish scrubby (nothing cute-sorry Mom). Since then I came across mooglyblog.com's flower crochet dish scrubby pattern. It is adorable! I had to make it, and I had a ball of nylon netting I needed to use up for the Stash Buster Challenge along with some cotton yarn. I am very pleased with the outcome. After I got done with that flower scrubby, I had to design my own! I really like it. Now for the pattern: In magic circle, SC 10 and join with a SL into first stitch. Row 1- Ch 1 and SC in same stitch. 2 SC in each of remaining st. Join. (20 st). Row 2- Ch 1 and SC in same st. 2 SC in next stitch. *SC in next 2 st then 2 SC in next stitch.* Repeat until end. Join.(30) Row 3- Ch 1 and SC in same st. *SC in next st., 2 SC in next.* Repeat until end. Join. (40 st). Row 4- Ch 3 (counts as first DC). 2 DC in same st. *Remove hook and insert into first of three DC and the last one (loop). Pull through. Ch 1. Skip one sc and do 3 DC in next sc. Repeat from * to the end. Join. I ended up with one extra space. Terrible of me, but I left it. Join. Row 5- Ch 1 and SC in same st. SC in next 2 st. 2 SC in next. *SC in next 3 st. 2 SC in next. Repeat from * to end. Join. Row 6- Ch 3 and skip 1 sc. SL in next sc. Repeat until end. join. Hanger- Ch 30 and SL into stitch at base. *Ch 3, skip 1 Ch and SL into next Ch. Repeat from*. Join with SL and fasten off. Scrubby: Magic circle- 10 SC and join. Row 1- Ch 1 and SC in same stitch. 2 SC in each remaining st. join. Row 2- Ch 3 (counts as DC). FPDC in same st. *1 DC in next st. 2 FPDC in next st. Repeat from * to end. Join. Fasten off. Attaching scrubby to dishcloth: I centered my scrubby into the center of the wrong side of the dishcloth. Using my yarn, I did a running stitch around coming up and back down around the single Double Crochet stitches. This accentuated the uneven texture created by the FPDC even more. Hope this makes sense! Enjoy.