Monday, July 22, 2013

FHE chart & Quilted Bath Mat

Wow!  Time has flown.  I have been super busy with projects, life and kids this summer and realized that I have not posted any of it for awhile (lol).

Many years ago I created a great FHE board, but we have not used it for a few years because it doesn't even have all our family members on it.  I have been thinking about this dilemma for awhile, and I had some inspiration during church yesterday. 


I cut a large piece of mat board (that is what I had in my storage room).  It worked well.  I didn't even have to paint it.  I created 1.75" squares using Microsoft Word for the name plates, cut them out, glued them onto 2" square patterned paper and laminated them using my Purple Cows laminator. This allows us to change the names under each assignment. I created the Title Banner using Microsoft Word as well and followed the same procedure as the squares.  I typed up some text boxes in Word with the following:  1) Date    2) Conducting    Opening Song      Closing Prayer    3) Opening Prayer   Testimony     Closing Song     4) Scripture    Refreshments     5) Lesson      6) Activity.     Then I followed the same procedure as mentioned above.   Next, I cut 1/2" strips of polk a dot print paper for the sashing (dividers).  I felt my title needed a little bit more so I took 2 pieces of scraps and layered them behind my banner.   I glued everything down with my hot glue gun.  Note: I only glued the edges of the 2" squares so that they would not be lumpy where I write the names.   To attach the ribbon, I punched 2 holes about 1 1/2" from each end.  I cut 2 pieces of ribbon 18" long and burned the edges, slipped one end in each hole and glued in place, then tied a bow and glued it in place really well.  That's all!  Note: I chose to do a rotation of 5 weeks since we have 5 people in our family.  That way everyone will have a chance to do each assignment.  After filling in all the blanks, I realized that the only blocks I need to change are the date blocks.  I could have typed the names and they would have looked nicer, but oh well!

The second project I want to share with you today is my quilted bath mat.  I needed a quick and economic fix for our bathroom.  I pulled out some cotton scraps and found some that kind of match our bathroom colors, sewed them into strips, pressed them with the iron and put a border around them.  Next, I layed out an old towel, placed the quilted top on it and cut the towel to fit.  Then I stitched the two layers together.  Out of the brown border fabric, I cut 2 1/2" strips on the bias, sewed the ends together to create bias tape, folded it over and pressed, then sewed it to the towel side, folded it over and stitched it on top.  Wah lah!  It has worked great.  It absorbs well and can be draped over the side of the tub to dry and adds a nice touch to the decor (at least I think so which is what matters, right?).


I wish you a wonderful day.  Thanks for stopping by!-Dari


Monday, June 10, 2013

Repurposed glass door with vinyl


I know this is a terrible photo of my project, but I am so excited to post it.  I couldn't wait until I got a picture frame bracket for the back.   When we threw out our old entertainment center last year (an appreciated hand me down for 10 years), I made sure we held on to this door.  I wanted to do a vinyl project with it.  Alas, it took me about a year to finally make the time for it.  Anyway, this is one of my favorite scriptures.  I used my Cricut and the following cartridges: Cindy Loo, Inspired Heart and Lyrical Letters.  The vinyl I used was a roll I purchased off of Amazon.  It is a repositionable adhesive backed black. It was quite cheap ($11.97 for 20 ft.)  Now, I just have to remember to get the bracket when I go to the store!

Hope you have a wonderful day!-Dari

Saturday, May 25, 2013

Mother's Day/Stash Buster Crochet

Wow!  We have been so busy lately.  It seems like yesterday that I posted, and yet I know it wasn't yesterday.  We have been gathering bids to build our house.  I finished school with my kids. We bought a new refrigerator.  We are trying to get the garden in and do some yard work.  Oh, and of course, the never ending mommy tasks of cooking, cleaning, and laundry!  I have not had a lot of time for crafting as you may have guessed.  That's OK (I think?).  There is a season for everything.

I never posted my Mother's Day gifts I did and thought I would share those.


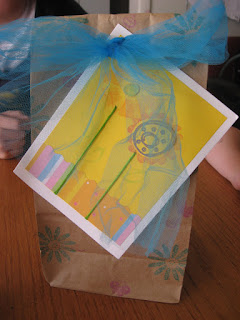
I really liked the way they turned out.  I know our mothers appreciated them.  They also know that I am a practical person and so they got a practical gift.  The crochet Swiffer pattern is my own.  You can reference my post about the crochet Swiffer cloth for the pattern. stamped two lunch bag sized brown paper bags with ink to coordinate with my homemade cards, folded the top over and punched two holes into the bag.  Then, I just threaded a ribbon through and tied it.  Very easy and cute.     

Sunday, May 12, 2013

Magnetic Art Board


This past week has been SUPER busy!  I feel as though I have been going full steam and the steam is running on fumes.  Ever felt that way?  You're human.  I'm sure you have.  The upcoming week looks as though it will be full as well.  I'm glad I was able to enjoy the day.  

This was a fun and simple craft I did with My Princess.  I purchased the magnetic board for $6.?? at The Wood Connection in Salt Lake a couple of weeks ago.  My Princess painted some simple wood cutouts, and we glued them to a wooden clothespin and magnet.  I cut out a circle from patterned paper with my Cricut and glued it in the middle.  We cut out the text and flowers with my Cricut as well using white contact paper.  You can refer back to my post about the Laundry Board for the depth and pressure I used to cut it.  We attached some ribbon and hung it on her wall.  

It is really cute and works great to hang up all her art "masterpieces" that accumulate.  This will be easier to rotate them, store them (until mommy gives them away or discards them) and just plain keep them off the floor or glued to the wall (don't laugh- it's happened more than once)!

We had a lot of fun doing this project together! Thanks for stopping-Dari

Wednesday, May 8, 2013

Stash Buster: Knitted Baby Hats


I finally finished the two baby boy hats I was knitting for two friends.  Once again I forgot to take a photo of my yarn before I began.  I found a very simple pattern at http://twentysomethinggranny.blogspot.ca/2013/01/knitted-baby-bow-hat.html. However, I misread the pattern for the first one (on the left) and didn't give a border between my ribbing and my color change.  I like it, though, and the recipient won't know I messed up!  The second one I chose a k2 p2 ribbing and deliberately made thick stripes.  These were very easy and whipped up quickly. 

The photo of the card is not the best.  I didn't realize it until I uploaded it.  I folded a piece of white cardstock in half and cut the top 2 corners on a diagonal.  I cut a piece of patterned paper slightly smaller than the dimensions of the white card base and then cut it in half.  Next, I cut a piece of light blue cardstock. the same size as the dimensions of the card base, but instead of cutting it in half, I tore the edge.  I cut out a small frame with a darker blue cardstock and inked the edges white.  I adhered it to the card using pop up adhesives.  On white cardstock I stamped the baby blocks and used watercolor pencils and a blending pen to give it a soft pastel look.  I adhered it to the card with a pop up adhesive square, too.  I cut a small rectangle, inked it, glued it to the top, and punched a hole in the middle.  I tied a piece of translucent ribbon on top and finished it by stamping the sentiment with an olive green ink.

Hope you have a great day and thanks for stopping by!

Friday, May 3, 2013

Laundry Board


How annoying that I can't turn off the underlining above.  Oh well!  Using cheap white contact paper, I cut out the text on my Cricut. I set the pressure to 2 and the blade depth to 4. Wah lah!

I am going to hang this in my laundry room (go figure), and as I am folding clothes, I will hang the "hang ups" on the pegs so they don't wrinkle while they lay over my craft chair until I get around to hanging them up (not very often!).  

I hope this helps me.  If not, it will brighten up my laundry room! Yea!!


Wednesday, April 24, 2013

Number Cards

Hello! Hello!  You may be wondering if I am going to post something crafty soon.  Well, I am working on knitting my first pair of socks, knitting a baby hat, and just finished crocheting another swiffer cover.  I don't want to post a pic of the swiffer cover, because it is the same pattern as the last one I did.  My socks are far from being finished, but I am hoping that my baby hat will be done in the next day or so.

I have been trying to focus a little bit more on my children, too.  I designed these number flash cards for our preschool board that I am envisioning, but as I was pondering what I wanted to work on with My Princess, I realized they would suit that purpose as well.  You can find the cards on my website, daris-corner.weebly.com.  You can also link to my website from the right. 

Anyway, these very versatile cards have been helping us with number order concepts.  I chose 3 cards in order 1-2-3 and layed them out in order.  We counted out loud while pointing to the cards. I had My Princess close her eyes.  I took one card out and placed it with 2 other cards above the others.  Then, I had her open her eyes and pick the card that went into missing space.  She really impressed me.  This wasn't challenging enough for her so we added up to 5 and then she wanted 0 in there, too!

After a few minutes of this, I cleared the floor (our work surface) and selected 10-11-12.  These are the numbers I feel she needs to work on at the current time.  She can count really well up to 10 and has a pretty good sense of one-to-one ratio, but when she counts past 10, she gets the numbers all messed up.  She really enjoyed this game.  I am going to continue using this method for a little while to strengthen/build her counting on abilities and her number sequence mastery.

I recently read, "You can be as happy as you decide to be."  What a great bit of advice.  We may not be able to control everything in life, but we can control our attitude.  Hope you have a wonderful day!  

Wednesday, April 17, 2013

Floor Size Phonics Mat


Hello! Hello! I have been a little frustrated, because My Princess has not been as attentive to my attempts at the Phonics Mat I painstakingly created.  Then it hit me.  How could I make it more fun?  It only took a minute before this idea came to mind.  I quickly ran into my fabric stash and grabbed the biggest heaviest piece I could find.  I layed it out on the floor and grabbed my scissors.  In just a few minutes, I was able to cut out the vowels from white felt.  Of course, My Princess was looking over my shoulder saying, "What are you doing mommy?"  Me- "It's a fun surprise sweetheart."  Well, as soon as it was done I said, "Can you jump on the letter that says, 'ehh'?"  She immediately responded by jumping to it.  We went through the vowels this way.  Next I jumped on a letter and said, "What sound does this letter make?"  She nailed it.  Then I asked her to jump on the corresponding lowercase letter.  After she grew bored with this, I grabbed hold of her hand and together we started from left to right jumping on the letters and saying the sounds.  We did this a couple of times.  What a wonderfully simple idea to whip up.  So glad I had it.  Too bad they don't happen all the time!

We have used "My Phonics Mat" as well.  I have found that she is learning, but I think it uses a lot of brain power so she gets overloaded very quickly.  We are now blending CV and CVC sounds.  Each little baby step adds up.

Hope you enjoy!

Monday, April 15, 2013

Stash Buster Crochet Newsboy Hat


Hello! Hello!  I have wanted to post something "yarny" for a week, but I've been caught up in trying to educate my children.  Amazing concept, huh?  I have done quite a lot of things with My Princess for preschool and will have to post about those adventures soon.

Anyway, I LOVE hats.  I also love to be outside and wanted a new hat for me.  That, too, is an amazing concept.  My children are always asking, "Who's that for?  I want one, too."  Well, this hat is actually for Me, Myself, and I!

I was searching Pinterest for some ideas and ran across a really cute design on  http://crochetncrafts.com/crochet/cross-over-long-dc-hat.html .
Seeing the designer's hat is worth the click.  You cannot see the Long Double Crochet pattern very well in my picture.  I think the black hides it.  

Once my hat was finished, I crocheted a little flower out of the bright light blue.  The pattern for this is the flower I used for my Tropical Flower Headband.  You can download that pattern on my website daris-corner.weebly.com. After I crocheted the flower, I hot glued it to an alligator clip so that I can interchange different flowers/motifs according to my mood.

Wishing you a wonderful day!-Dari
Thursday, April 11, 2013

NUMBER BEAD LOLLIPOPS


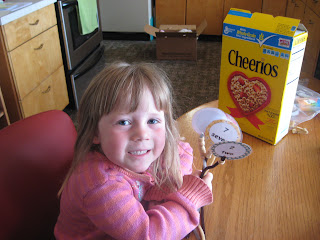
I really like these "lollipops!"  Although they are inedible, the counting resources can be.  The inspiration for these came from a picture I saw on Pinterest. There were some construction paper rectangles folded in half with the number written on the front and a pipe cleaner attached to it.  Easy enough concept.  I wanted mine to be a little more versatile than that, so I wrote out the word on each and just had to make it cute!  
Originally I thought we'd just use pony beads, but as soon as they were finished, My Princess said she was hungry.  Suddenly I merged her desire for food with my desire for her to get some preschool done.  Thus, Cheerios were used.  Win win situation.  We love those.
Anyway, I chose 4 random numbers for her to recognize and then string the correct number of Cheerios on.  As I watched her, I thought, "You could extend this activity to include number order, patterns, skip counting.  Wow! You could even use these to teach/reinforce addition or subtraction concepts."  I love when you get more out of something than you thought you would.
You can find both a black and white template and a color template of this activity along with the directions and some of my educational ideas for it on my website.  You can find the link on the left of this page.
Hope you enjoy!- Dari

Saturday, April 6, 2013

Stash Buster Knitted Dish Cloth and Swiffer Mop Cloth


OK, so I am taking an online knitting class and finished my first knitted dish cloth.  I am pretty pleased with the results (with the exception of the white pointed corner).  I will have to learn how to decrease and cast off without a funky point!  Any words of advice are welcome! Although this is not a 100% stash buster project, it began as one.  I got half way through the project with the pink and realized that I didn't have enough to finish, so I bought some white (the dye lot did NOT match). Go figure!! 

After I finished this, I immediately began crocheting a Swiffer Cloth for my sister-in-law.  I helped her this morning with some of her cleaning and decided she needed one.  She doesn't like purchasing the disposables.  They are expensive.  Who would?  Anyway, I had an almost full skein of the white yarn I purchased for my dish cloth and thought it would work just fine.  I typed up my pattern and posted it on my website if you would like to use it. 


Hope you enjoy my yarn creations!

Thursday, April 4, 2013

My Phonics Mat

I finally finished my smaller version of Sally the Sound Snail. Yea!  She will be much better suited for the desired purpose.   So, what is her purpose you ask?  Sally helps blend sounds together.  In some of my research for language/reading development, I ran across several methods that use either a sound train or a board to help children blend sounds together, thus beginning the process of creating words.

This is just the direction I have been trying to go with My Princess, but was not sure how to accomplish it.   As I merged ideas from these various sources, I came up with "My Phonics Mat" and Sally the Sound Snail.  Here are my ideas for using the mat and snail:
1) Place letter cards on the mat and have Sally slowly slide across the mat while saying the sounds out loud.
2) Place all the vowel cards on the mat and have My Princess put Sally on the card that makes the sound I dictate.
3)Have My Princess place letter cards on the mat to build words and then sound them out.
4) Write a word on a paper and have My Princess recreate the words with the letter cards.
5) Reverse the process by using the letter cards to create a word and having My Princess write the words letter by letter on the mat using dry erase markers.
6) I am sure I will come up with other uses for it!

I laminated "My Phonics Mat" for durability and also to enable My Princess to write directly on the mat.  Right now we are using it to solidify her understanding/mastery of the soft vowel sounds.  Next, we will add one consonant sound at a time and blend it with the vowels individually.  Progression will follow.

I would love for you to use this as well to help you in your educational endeavors.  You may download "My Phonics Mat" and my letter cards on my website.  The link is found at the right!
If you come up with any other ideas to use this, let me know.  I'd love to hear.

Wishing you a happy day!- Dari

Monday, April 1, 2013

English Garden Crochet Hat

Hello!  Although I have been working on busting through my yarn stash, I actually purchased this Caron Simply Soft Autumn Red yarn specifically for this hat.  It is another one for my cousin-in-law.  She loves this color.  I designed this hat using a Griddle Stitch pattern.  It is ideal, because it can be worked on any number of 2 stitches.  I always make my hats in increments of 10, so this stitch fits the bill. 
To create this stitch, add 2 st to base ch.  Skip 3 ch (counts as first DC), *1 SC into next ch, 1 DC into next ch; repeat from*.  When using this in row fashion, end with a SC in last stitch, turn. Row 2: Chain 3 (counts as DC), skip 1 st, SC into next DC, DC in next SC, etc. until you reach end of row.End with SC in top of turning chain, turn. Repeat Row 2. When working with this stitch in the round, I increased alternating SC and DC in the same st.Of course, this doesn't look the same as it would in row fashion, but it does add texture and is different than a simple SC or DC pattern.

For the cables, I only used FPDC!  This pattern is worked over a set of 6 stitches.  Rows 1 & 2- CH 1, SC in same st and SC in each remaining st. SL to join.  Row 3: CH 1, SC in same st and in next st, FPDC around next 4 st, *SC in next 2 st, FPDC around next 4 st.  Repeat from *. SL to join at end of row.  Row 4: CH 1, SC in same st, SC in next, *skip 2 SC, FPDC around next st 2 rows below, FPDC around next st 2 rows below, go back to first skipped st and FPDC around that st 2 rows below, then FPDC around next st 2 rows below, SC in next 2 st. Repeat from*. SL to join at end of row.  Repeat rows 1-4.

For my flower, I used a pattern that I pinned from Lianka Azulay.  The source is: http://bonitapatterns.tumblr.com/post/3994231401/here-goes-a-free-pattern-for-a-croco-flower-its

Hope you enjoy!


Friday, March 29, 2013

Easter Candy Bar Wrapper


We had a wonderful time in Las Vegas.  We spent 5 days there.  We visited Hoover Dam, Excalibur, an arcade, Build-A-Bear, the World Finals Monster Truck competition, my cousin and her family, Church, the LDS temple and a yummy sushi place. It was great.  My favorite part was visiting with my cousin.  She and I have always been close, and eventhough we haven't seen each other for a couple of years due to distance, it felt like it had been yesterday since our last visit.

When we got home, we were welcomed by my sister and kids.  That was fun, too.  The kids loved playing with their cousins.  I am so grateful the weather was nice so they could play outside A LOT!  8 kids who are running on excitement can be exhausting!! My sister and I managed to try to be a little crafty.  At the grocery store, we found a cart full of the BIG candy bars for $.59 ea.  Score!  We loaded up on them.  The picture above is what I ended up doing with the 12 I got.  As I was addressing each tag, I realized I needed one more.  Oh well.

This morning I am relaxing now that my vacation(s) are over.  I am feeling the old adage- I need a vacation from my vacation.  The positive part, though, is that I am feeling better than I have.  3 1/2 weeks of bed is not fun.

Happy Easter!

Wednesday, March 20, 2013

Stash Buster #12 Gel Ice Pack Pillow

I am so excited about this one for lots of reasons! First, it is very practical and needed at the current time in my life; second, I love the way it turned out; and third, I used a new stitch which is really fun.
So, what am I so excited about? Gel Ice Pack Pillow.  I have been layering washcloths and ice packs on my face for a couple of weeks now. During one of my moments of frustration I thought, "I should make something that would keep these layers together."  Some of the best inventions are created out of necessity!


I even remembered to post a picture of the yarns I used from my stash.  As you can see, most of my yarns are not in beautiful balls.  Once upon a time.  I don't even remember when that part of my life went out the door!

I wanted to share an up close photo of the sedge stitch I used.  It is one I will definitely work with again.  To create this stitch you need any set of 3 stitches + 1.  For the chain base, add 2.  Turn.  Skip 2 ch, HDC & DC in next stitch; *skip 2 ch, SC, HDC & DC in next st, repeat from * until end.  In last stitch, SC only.
Consecutive rows: Turn, CH 1 (counts as SC), HDC & DC in same st, skip 2 st and repeat from *. That's it!  It has a nice subtle texture and pretty pattern.

To top this off, I made homemade gel packs.  Oh! No! I forgot to take a photo of one.  However, here is the recipe.

HOMEMADE GEL PACKS

1/2 C rubbing alcohol
1 C  water
Blue food coloring
ZipLoc sandwich bag
Food Saver bag and sealer, opt.

Fill sandwich bag with ingredients.  Seal. Place in freezer overnight.  How simple is that?  They work great!


Monday, March 18, 2013

Stashbusters #9-#11 Amigurami


Hello! As I am looking at my pictures, I realized I haven't glued the eyes onto my turtle, and I don't have an individual photo of my knitted bunny (lol)! Oh.  I also forgot to take photos of the yarns I used from my stash.  Oops! I created the snail with the intention of using her for "My Phonics" preschool mat curriculum I am working on, but alas she is TOO big.  She is about 7 inches long.  For my educational purposes, this won't do.  From my little princess' perspective, that is just fine.  I will have to make a mini snail. The turtle with the missing eyes (lol) is for my oldest son.  He really wanted a cute puppy, but after my ugly cheetah I made for my second son, I lost the excitement to make a puppy.  I might have to practice some more, but amigurami is not my favorite.  The knitted rabbit is my second attempt at knitting.  I found a really good tutorial at http://josoandsew.wordpress.com/tutorials/knitted-bunnies/.  I made mine 15 stitches larger than she did.  I think I will make one a little smaller than hers.  It is very cute and a very good beginner project. Yea!

Thursday, March 14, 2013

Stash Buster #8 Tropical Flower Headband


OK, so it is really UNUSUAL for me to post more than once a day! As you may have noticed, I haven't been consistent with posting on a regular basis for a while. I don't have that much free time with homeschooling, cooking, cleaning, creating, etc., but I have been under the weather and so I have had a little more time lately. As I was browsing on Pinterest earlier this morning, I ran across a really pretty crochet flower and thought, "That would be perfect for the headband I want to make." Unfortunately, it did not have a corresponding pattern. I printed the picture and picked it apart and thought, "I can do that!" Of course, I had to get to work while the puzzle pieces were in my mind!

The result? My tropical flower headband!!  I love it.  I am uploading the pattern, which I typed up today, too, onto my website.  The link is on the right column.  I am just tickled with the way it turned out.  If you like it, let me know!

Happy hooking!

Stash Buster #7 Beaded Watch

Hello! Hello! I bought a watch face at Michaels on clearance a year ago with the intention of making myself a watch. Well, it took me almost a year to get around to it! I am quite pleased with the results. I used a HDC Multiple Cluster stitch. It gives the fabric a nice texture. To work a HDC Multiple Cluster stitch, you need a any stitch count of 2 stitches + 1. So, you could have 8+1=9 or 20+1=21. For the base chain, you need to add 1 more. At the beginning of the row, chain 2 (counts as 1HDC), *1 MC (multiple cluster) by YO, insert hook into same stitch, YO, draw loop through, YO, draw through 2 loops, skip 1 st, [YO, insert hook into next stitch, YO, draw loop through] 2x in same st (6 loops on hook), YO, draw through all loops on hook. Wah! Lah! Repeat from * across row. You should finish an MC in last stitch. HDC into same place and turn. Begin again. Have fun. Hope you enjoy!

Monday, March 11, 2013

Stash Buster #6 Crochet Book Tote

I am so excited to share this. I have been working on it for 2 weeks now. I finally finished it last night. This is my new scripture tote. I got the inspiration from Laura at http://tillietulip.blogspot.com/. I just love her daisy granny. She has a free tutorial on her blog. I put a fabric lining on the inside. It has 2 pockets, one on each end. One of them is divided into smaller pockets for pens, etc. After I finished the handle, I decided I wanted to embellish it with a matching daisy. I had to modify it, however, because I didn't want it to be a granny square. So..... DAISY EMBELLISHMENT PATTERN 1) I began with a magic circle and did 11 sc into the center. SL into top of first one. 2) With pink color, I SL into any space, *then chain 4, 2 TC (treble) in same space, chain 4, and SL into same space. 3) SL into next space and repeat from *. To finish off SL into base of first petal. Fasten off. Weave in ends. Really easy! I added a corkscrew instead of leaves. Using brown yarn, chain 32. Turn. HDC in 3rd chain, 2 HDC in each of remaining chains. Fasten off. Weave in ends. I ended up using more yarn colors than I had originally posted. Here is what is left of the colors I ended up using. Thanks for stopping!

Thursday, March 7, 2013

ABC Lotto & Number Wheel Games

Wow! I can't believe it is already Thursday. It has been such a busy week. We have finished learning the alphabet in preschool, and I wanted a fun way to review the letters and sounds with my little princess. Thus, ABC Lotto was invented. This is not a new concept, but I had a different spin on the activity. I laminated my boards- each card is different. I purposely made one with the letters in alphabetical order. I gave each player a handful of chocolate chips. Of course, they got to put 2 chocolate chips on the freebie stars. From my board (alphabetical order), I called out, "What letter makes the .... sound." When they found it on their board, they put a chocolate chip on it. Because the boards are not organized in the typical Bingo manner, when a player got 4 in a row vertically, he/she could eat 3 chocolate chips from his/her pile. This also helped review one-to-one counting of 3 and 4. I randomly picked a letter from my board and marked it off with a dry erase marker. After the game was over, I simply sprayed each board with my homemade disinfectant spray and wiped with a paper towel. Good as new! Ready for the next game. You can download this game on my website. The link is on my sidebar. Hope you enjoy. Oh! I made one in alphabetical order so that I could use it as mentioned above, but also so we can review the letters in order. To do so, just use the one board, point to any letter and say, "What comes after the letter ....?" or "What comes before the letter ...?" You could also have each child find the letters in his/her name and place markers (chocolate chips or ?) on those squares. The second game I created this week is the Number Wheel. Once again, this is not a new concept; however, my little one can count one-to-one up to 10 and I wanted to challenge her a little more. So, my number wheel goes up to 16. I will be gluing my circles onto clothes pins. Why? Because I like to kill more than one bird with each stone. The clothes pins not only are the means to match the numeral with the amount of dots, but will also build finger dexterity and coordination. Opening and closing the pins strengthens little muscles that are just developing. You can also download this game from my website. I will post my finished game here(when I get the clothes pins glued on). Until then, here is the photo of the wheel and some of the circles. Happy learning! -Dari OK. Here is the finished photo. Hope you enjoy! My little princess sure has.

Monday, March 4, 2013

Life's little Satisfactions!

OK, so hopefully you are not as bad as I am! I hate cleaning the fridge. It is one of those chores that I despise. Maybe if I did it as often as I should, it wouldn't be so bad. The last time I scrubbed out the fridge was Thanksgiving! I decided to swallow my pride and take a before and after picture. As I was cleaning, I was creating my post in my mind. I was going to take a picture afterwards of a sparkling clean EMPTY fridge and say, "Unfortunately, I have to put the food back in." The funny thing is that after I got done cleaning, I forgot that little detail! It wasn't until I got all the food back in that I realized I hadn't taken a picture of my clean fridge. LOL!! So, here is the picture of my clean organized fridge. After I scrubbed it out, I sprayed it down with my homemade disinfectant spray and quickly wiped it with a paper towel. I love my spray. Here's my recipe: HOMEMADE DISINFECTANT SPRAY 2 C. distilled water 1/2 C. distilled vinegar 10-15 drops essential oils (I like 5 drops peppermint, 5 drops lavender, and 5 drops lemongrass). This changes. Sometimes I will put tea tree oil, rosemary and geranium. Or, lemon and peppermint or..... Place water in spray bottle. Add vinegar. Then add oils. Put lid on bottle and rub bottle back and forth in hands to evenly mix up oils. Essential oils are antibacterial, antiviral and antiseptic. Amazing resources from nature!! I'm addicted. Hopefully, this will motivate me to not procrastinate so long.