Friday, February 28, 2014

Crochet and Quilt Hot Pads


I so did not intend to post hot pads back to back!  I finally finished these yesterday.  I began them a month ago while watching the JR. High State Wrestling Tournament.  When I came home, I left them in my yarn bag and haven't thought much about them until yesterday.  I pulled them out and was able to finish them pretty quickly.

The tops are crocheted in 100% cotton.  There is a piece of white cotton fabric sandwiched between the top and a thick heavy fleece fabric.  I cut some print fabric on the bias and created the bias tape used along the edges.

I have made 2 of each to sell on my Etsy site.  Hope you enjoy!  Have a great day- Dari.

Thursday, February 27, 2014

Heart Pot Holder

Good morning!  A few weeks ago I saw a pin for this on Pinterest (one of my addictions).  I justify it because I actually use alot of ideas I find there for inspiration to create my own little works of wonder.  Although I did not follow the creator's instructions, I thought I would give you the website, because I am not going to give you a tutorial for this project.  http://www.youcanmakethis.com/products/-too-heart-to-handle-oven-mitt.  Ha! Ha!  I didn't realize that she actually charges for her pattern.

So, maybe I will post a tutorial on this in the near future.  I also noticed that hers doesn't have the binding around the edges like mine does.  That's ok, but I like mine!  I really liked this idea, because you can use it like a flat hot pad OR you can insert your hands into the sides and actually grab your pans with it.  Really awesome idea!

I made one for each of the sisters I visit teach each month.  They really liked the gift and were excited to use it in their kitchens (at least that's what they said- lol).

Look for the tutorial soon! Thanks for stopping by. -Dari

Wednesday, February 26, 2014

Barbie Washer and Dryer


My little Princess and I have had lots of fun over the past few months creating Barbie necessities for her doll house.  She loves to play Barbies and watch Barbie movies and....  you get the idea.  Anyway, about 3 weeks ago, she approached me and said, "Mom.  We need to make a Barbie washer and dryer, because their clothes are dirty."  She said this in all sincerity.  I had to turn around so that she didn't see the huge smile that burst upon my face!  It was quite the dilemma, so we pulled out two empty Kirkland Brand Soy Milk cartons.  I cut out the top third from the sides and bent the front in.  This formed the washer and dryer tops.  Before closing up the machines with the contact paper and hot glue, we inserted a Dannimals yogurt cup inside the washer and a small cardboard box inside the dryer. Then we hot glued the edges shut and covered them with white Contact paper.  We cut out a circle for the washer and a rectangle out of the dryer. Out of scrap cardboard (double layer thick) we cut the fronts out. We painted these pieces pink.  For the washer:  In between the two circles, we glued a piece of plastic from a package, used a scrap of the soy milk carton for a hinge to attach the door to the washer, glued Velcro on so that it could open and close.  For the dryer: We cut out two scraps of the soy milk container, turned them upside down (shiny metallic looking) and glued them to the door and the dryer.  To embellish both machines, we hot glued various beads for the knobs, hinges and handles.  After we were done, we HAD to wash and dry ALL the Barbie clothing we have.  The Princess rotated the laundry through the machines, then it was my job to hang up the laundry or fold it and put it on the shelves.  How come even in play I have to do my least favorite part? :)

Hope you have a great day!-Dari

Tuesday, February 25, 2014

Patriotic Apron with Crochet Flower

Hello! Hello!  I finally finished these three aprons that I started a month ago to sell on my Etsy shop.  Life has been very busy the last little while.  There are always excuses, right?  Please tell me I'm not the only one!!!

As I mentioned before, I have 3 of these available for sale.  As with all of my creations, they are created as I go meaning that during the creative process I tweak each one to modify it and it takes on a life of its own.  I have a really hard time duplicating the same thing exactly, because I always think, "Oooh.  That would be better," or, "I wonder how that would look."  The first one I made is a perfect fit for me.  That being said, I had to enlarge the next two, because I realize that not everyone is the same size as me.  Each of these aprons has a different red button in the center.  One apron has fabric ties.  One has ribbon ties.  However, they all look the same and so I posted the best picture.  (I have come to the conclusion that I need to learn how to take better pictures).

I thought I would share the crochet flower pattern with you, because it is so easy and is a very versatile embellishment. I used a size H crochet hook and medium (size 4) Simply Soft yarn.  The source is from the book Crochet Stitches: Visual Encyclopedia.

Ch 5, sl to form ring.
Ch 7 (this counts as dc & ch-4 space), *2 dc in ring, ch 4.* Repeat 5 times.
Dc in ring, sl in 3rd ch of beginning 7-ch.  Do NOT turn (should have 12 dc).
*Sl, sc, hdc, 5 dc, hdc, sc, sl* in each ch-sp around.  Fasten off.

That's it!  Hope you enjoy! -Dari

Monday, February 24, 2014

I See Sam and Mat Puppets


Hello! Hello!  I hope that you had a wonderful weekend.  I ran away on Saturday.  It was wonderful.  I needed a break and went to the Provo LDS Temple.  I basked in the peace and beauty.  And, it was warm down in the valley (upper 50's!).  Heaven.  It instilled hope in me that this perpetual winter's end is in sight.  I think that is the one thing I miss about living down in the valley- longer springs and autumns.  Oh well.  I wouldn't trade what I have up here in the mountains for that.

My little princess is ready to read.  I have felt it for awhile.  Although we are blending sounds in preschool, we haven't began putting words together in sentences.  The class just isn't ready for that.  So, the other day, I decided to see if I could find the books that one of my sons used when he learned to read.  They are an old emergent reader series that build upon each other.  I have really been pleased with them.  Apparently, because I remembered them over all these years.  There is quite a gap between my older children and my Princess.  Anyway, they are called I See Sam.  They are now available for free at www.marriottmd.com/sam/index.html.  Well, she has had so much fun with them that I decided to give her some homework!  I created these paper bag puppet patterns.  She colored them, cut them out, glued them and then wrote Sam on the Lion puppet and Mat on the Rat/Mouse puppet.  You are free to grab yourself a copy via my website.  They are located under my Preschool Rescources Tab. As always, you are free to use them for noncommercial use.

Hope you have a great day and thanks for stopping by! -Dari

Saturday, February 22, 2014

Crochet Earrings


I think I am doing pretty good with my new system.  I have posted for the last three days.  Go me!  Yesterday I took 10 minutes and finished the top pair of earrings (teal).  They are made out of cotton yarn.  To make: I used a size F crochet hook. ch 5, sl to join.  ch 1, 12 sc in center, join to top of first sc. * ch 3, skip 1 sc and sl into next. Repeat from *.  sl into base of first ch.  fasten off.  The rest is really simple.  I opened the earring and inserted around one yarn segment closing with needle nose pliers.  Then I attached the charm to the bottom of the earring using a jump ring (I think that's what it is called) by opening it up and attaching a segment of yarn and the charm to it.  Then I used needle nose pliers to close it.

The second pair (purple) is made using regular (weight 4) yarn.  Both types of earrings were made from scraps, and I can't remember what brand they are!! Honestly, I am not all that concerned about wasting precious brain cells to try to remember, either!  Anyway, using a size F crochet hook, I chained 16.  Then I sc in the second ch from hook twice, *1 sc in next, 2 sc in one after*.  Follow this pattern to end. Ch 1, turn and repeat the same pattern.  Fasten off and weave in ends.  After playing with the curlique and deciding  where the best place for the earring to be attached to (I had technical difficulties and must confess that I pulled the earrings apart a few times before I was satisfied with how they hung), I closed the loop with needle nose pliers.

I know these instructions are simple.  I hope they make sense.   These were really easy and fun to make.  If you don't understand the directions, just leave me a message, and I will try to help.  

As always, thanks for stopping by! -Dari

Friday, February 21, 2014

BUNNY MONEY GAME


I am so excited to share this with you!  A few weeks ago for preschool, we learned about the letter B.  The entire week's curriculum was centered on the picture book written by Rosemary Wells, Bunny Money.  I created a board game that reinforces the story sequence, strengthens one-to-one ratios 1 to 3, and counting.  I am pleased to offer this game free to you for personal and educational use.  You can find the file at my website.

Here is a tutorial for the wallets used in the game:


You will need a piece of construction paper or cardstock. Lay it horizontal like the picture above.
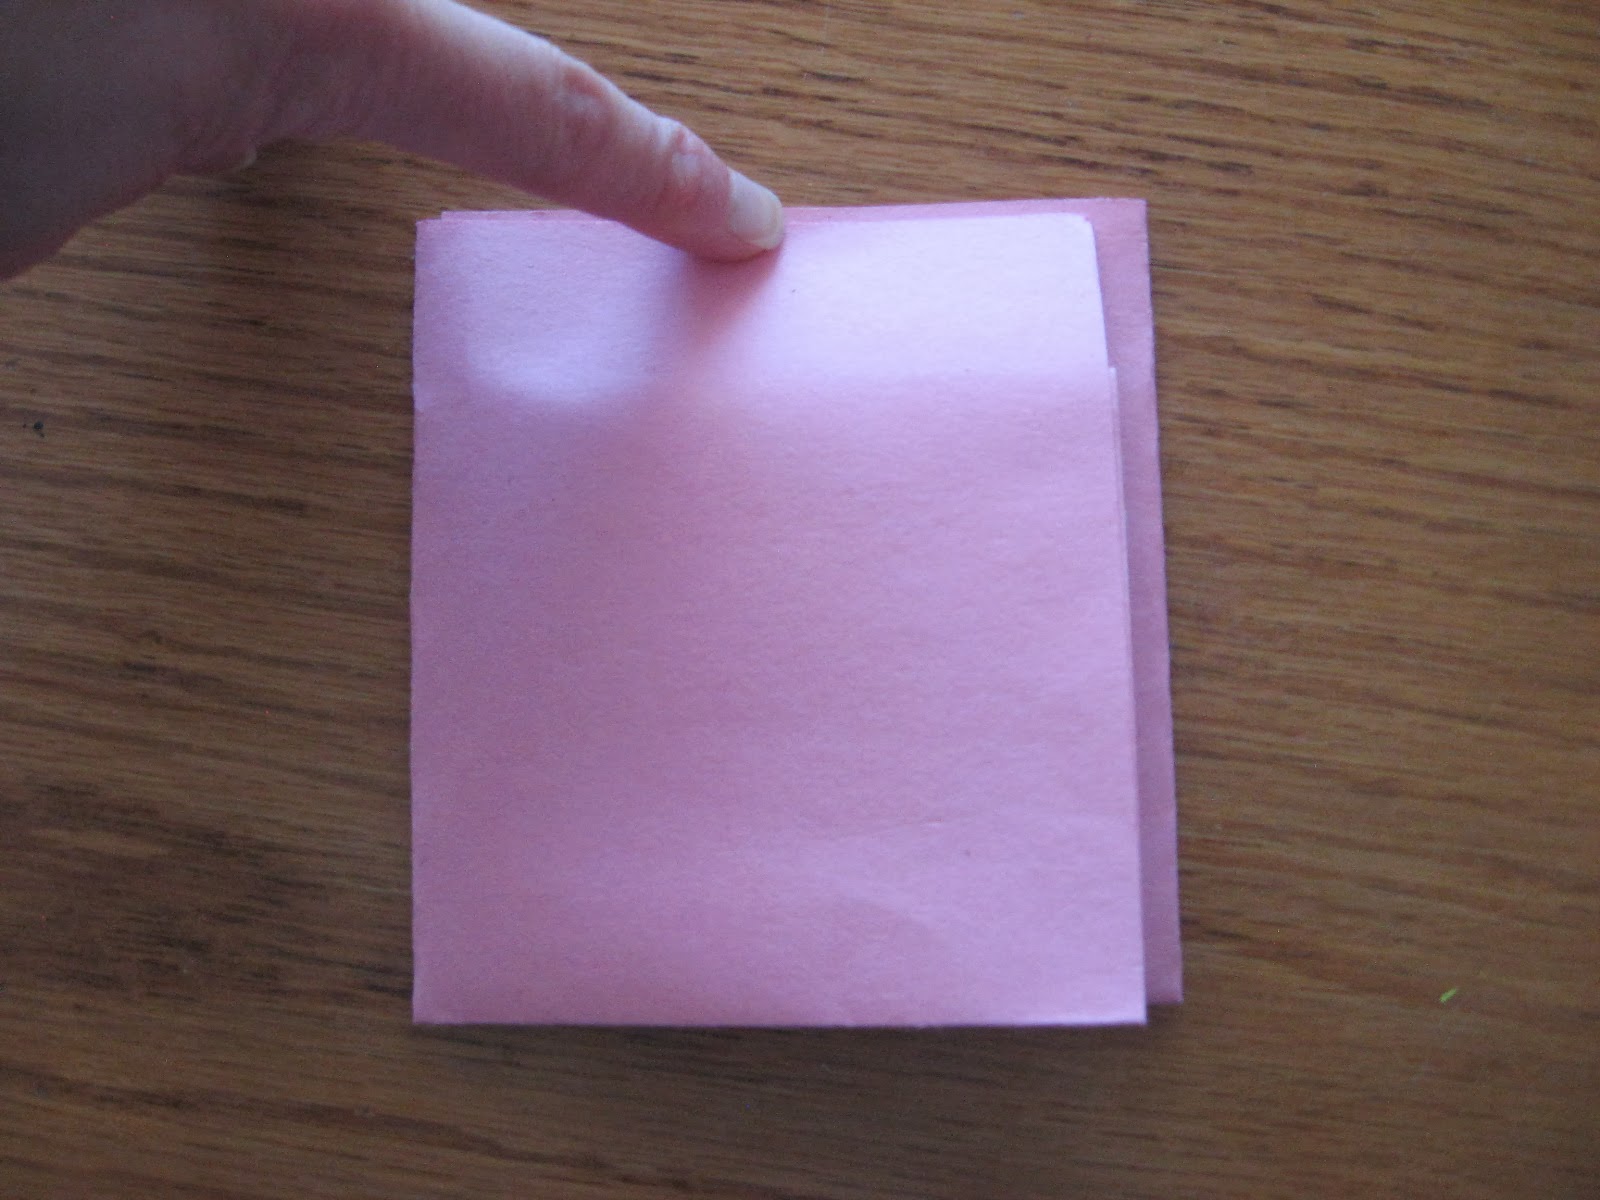
Fold the bottom up 1 in., crease and glue it in place.  Flip the paper over so this bottom crease is underneath.
Fold up the edge with the crease so that it is 1 inch from the top as shown in the photo.  Crease in place.  Glue the two side edges.
Fold one side over about 2/3 and then fold the other side so that it is on top.  You should end up with a rectangle resembling a wallet.
 
Hope you enjoy!

Thursday, February 20, 2014

Knitted Bolero

I finally finished my last Christmas present (for last Christmas)!  I at least get credit for finishing my project, not giving up, and not settling for a last minute gift just so it was out of my hair, right?  I was thinking about ALL my projects and fun things I've done since I posted last, and it was kind of hard for me to pick one to post.  I want to post.  I want to share my creations with others.  I want to do better in this area.  I have some thoughts to help me.  We will see if they work or not!

Anyway, I made this for my sister for Christmas.  I really wanted to make one for myself, but this took me 6 weeks, and I am not ready to start another yet.  The inspiration for this came from two sources.  The first one is a ravelry pattern by Kelly Maher titled "Ribbed Lace Bolero."  I began using it but was having a difficult time working the stitch pattern.  I reverted to a lace pattern that I did for a pair of socks.  Not sure if the pattern was easier or more difficult, but my fingers were used to it so it worked for me.  It is called "Summer Lace Anklets" and is found in the One Skein Sock Yarn Wonders book, which by the way, I love most of the books in this series.  Lots of inspiration!  Here are photos of my finished creation:


Thanks for stopping by! -Dari